
I understand that nobody enjoys reading user manuals. However, before you claim that something isn't working, please take a moment to read this brief text.
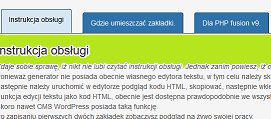
Since the generator currently doesn't have its own text editor, you need to use a text editor available in your CMS.
Then, in the editor, open a preview of the HTML code, copy it, and then paste it into the field of the form named "Bookmark Content".
The function to edit text as HTML code is likely available in all CMSs at present.
Even CMS WordPress has such a function.
After saving the first two bookmarks, you'll see a live preview of your work.
Then, you can add more bookmarks until you reach the desired number.
Dann können Sie den HTML-Code der generierten Lesezeichen in die Zwischenablage kopieren oder den HTML-Code auf Ihren Computer herunterladen, der in einer Textdatei gespeichert ist.
Inserting the HTML Code: After downloading the HTML code, you can insert it at the appropriate location on your website.
Make sure you insert the code in the correct section or on the right page.
Usually, you'll need to open a preview in the text editor to insert the HTML code.
Save and Publish: After inserting the HTML code, save your changes on your website.
Ensure that the new bookmarks are visible on your website and function properly.
This is the text. Where should the bookmarks be placed?
It is quite possible that bookmarks do not perform well in messages. If at all, they should be placed at the end of the message. Then we can add additional information or links to other messages. Outside of messages, such bookmarks will almost always play a positive role. Especially on pages offering services or selling products. Or simply on a cooking blog. It goes without saying that there must be self-promotion at the beginning of an article or blog. Because the beginning of the text influences the indexing of the pages. But usually, people are not interested in your advertising, but in product information or advice. If you cannot provide users of your website with quick access to relevant content, they will search for another website after a few seconds.
Why is it worthwhile to use the Bookmark Generator?
Practical Tips.
This generator has been specifically designed for the PHP Fusion v9 CMS and utilizes its built-in functionalities, which constitute about 80% of the entire project. The remaining 20% consists of original ideas and minor script adjustments that provide added value for website owners using this Content Management System.
In addition to standard HTML code, PHP Fusion users can utilize an option to generate a ready-made PHP file, which can serve as an administration panel with corresponding CSS style. If the provided style is unsatisfactory, it can be easily removed.
It is important to note that PHP Fusion v9 does not insist on panels being written in PHP, allowing for the embedding of HTML code. The only requirement is that the file has the .php extension.
To convert a text file into a PHP file, you don't need any special software. A simple text editor like Notepad is sufficient to open the file and then save it with the .php extension. However, pay attention to the correct encoding; usually, this is UTF-8, and ensure that there is no Byte Order Mark (BOM) to avoid issues with panel functionality.
Although spaces may not be visible during editing, any browser can interpret them as errors on the website. Therefore, it's important to remember the correct encoding.